It happens sometimes with an AWS EC2 instance that you made a mistake in network configuration or just your instance is inaccessible via SSH for some other reason. In this case the recommended solution is attaching your root volume of your instance to another one (most likely micro instance – who wants to pay more?) and editing the files on it.
Below you can find a guide of how to do this with screenshots and steps.
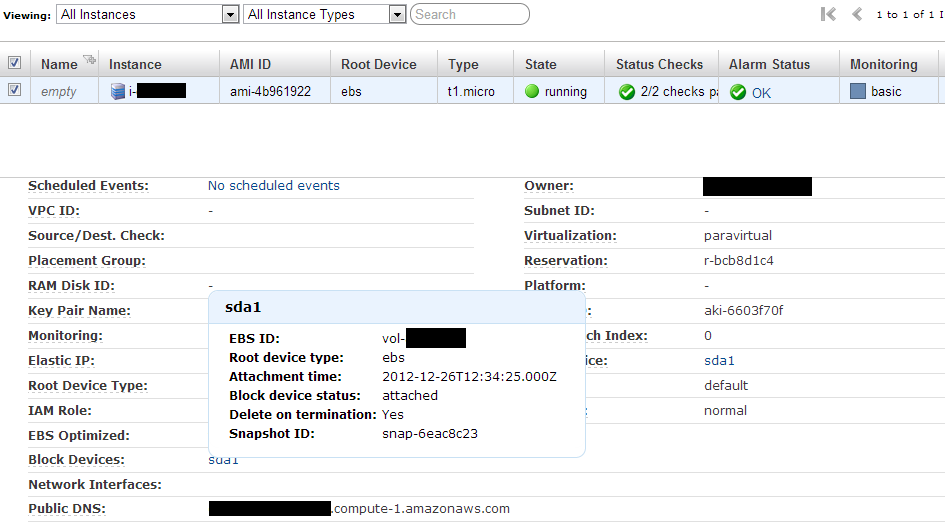
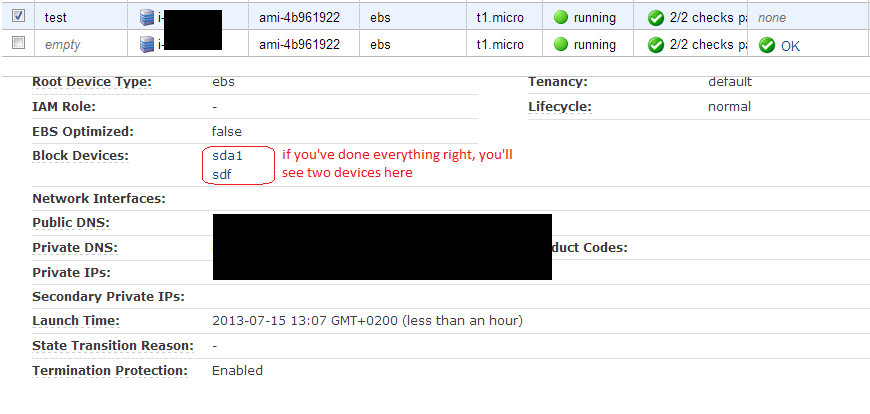
1. Here is your instance that you can’t connect to and if you click on it and then on the first item in „Block Devices“ you’ll see something like below. With random stuff in your case in the masked areas:
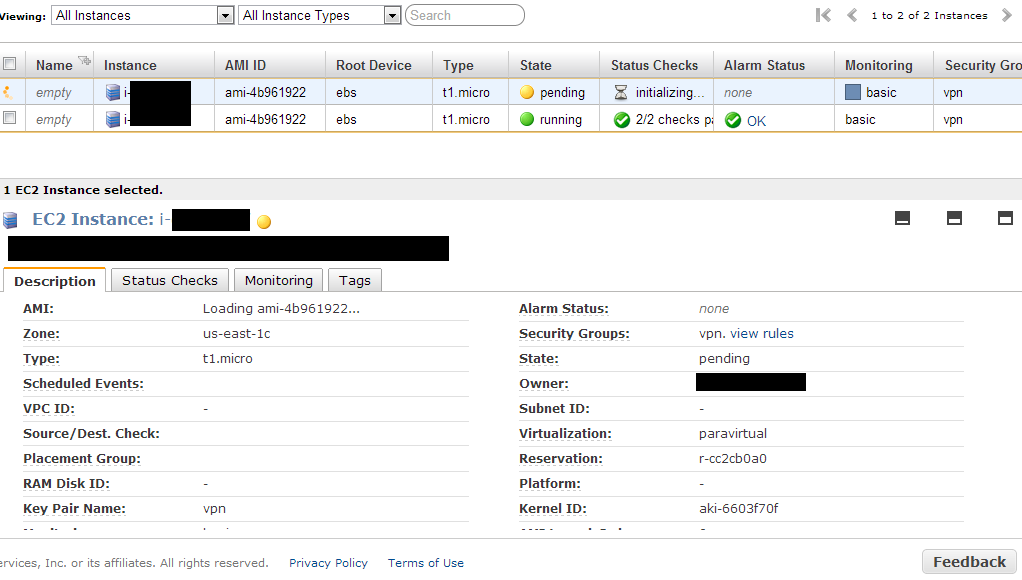
2. Let’s create another micro instance that will just serve the purpose of „host“ for the root disk volume of your problematic instance. Click „Launch Instance“ button , select Micro type, default security group, same keys etc, etc. Try to select the same kernel version and preferrably use the same AMI, if you’ve ever created one. If you have, just select „My AMIs“ in Classic wizard of „Launch instance“ dialog. If not, just select the same keypair, kernel version, micro type, same availability zone. So finally you’ll see it launching in your console:
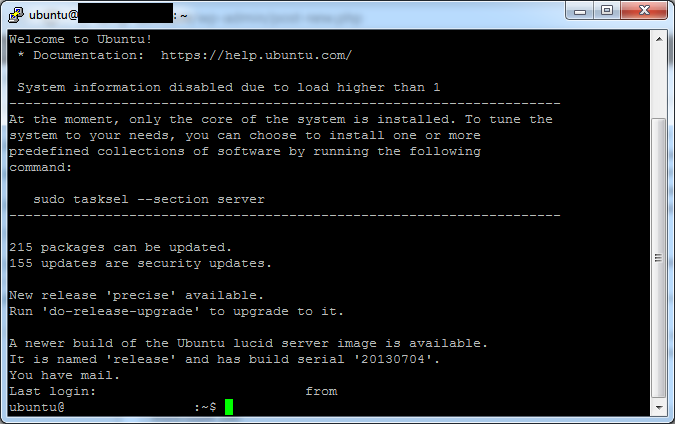
3. Wait till it fully launches and make sure you can connect with the key you setup while creating it , so for example, I use putty on windows and here is a screen of me connected to the new instance:
4. shut down your „problematic“ instance. Make sure there is „Stop“ in „Change Shutdown Behaviour“ of the context menu of the instance. If there is „Terminate“, change it to „Stop“. Make sure that termination protection enabled. If not – ENABLE! it (important, otherwise, you’ll lose everything once you turn it off!) This can be done in context menu of the instance.
5. Locate the root volume of „problematic“ instance in „Elastic Block Storage“ -> „Volumes“. You can write down/copy the volume ID by selecting the instance and copying the string „vol-“ from „Block Devices“. And then locate this volume in „Volumes“ section.
6. Right click -> Detach Volume. The „State“ column icon should become blue and status „Available“. See the screenshot of Volumes section below and the link that you should click:

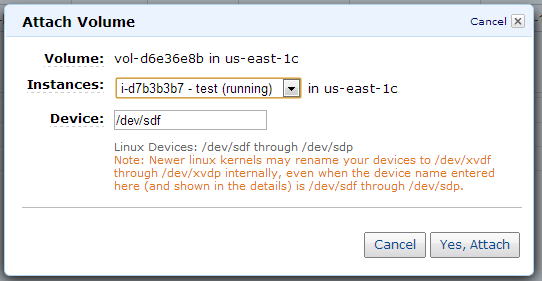
7. Right click on the same volume (the one you just detached) and click „Attach“. Select the newly created micro instance in the drop down in appeared popup window. It should be with (running) label. Remember and not change the „Device“ deafult value in the popup. For example, here in our case it is „/dev/sdf“
8. See the screenshot below. If you did everything correct, you’ll see two devices attached in „Block Devices“ section when you click on your newly launched instance.
9. connect via SSH to your newly launched instance. (see step 3 here). su under root. Launch the following command, where „/dev/sdf“ is what you had in the popup on step 7. If you need , you can mkdir /mnt/slave as root beforehand or just mount it under /mnt:
root@#########:/mnt# mount /dev/sdf /mnt/slave/
That’s the most important command here in the tutorial and if everything went well, you should see nothing in the output of mount command above.
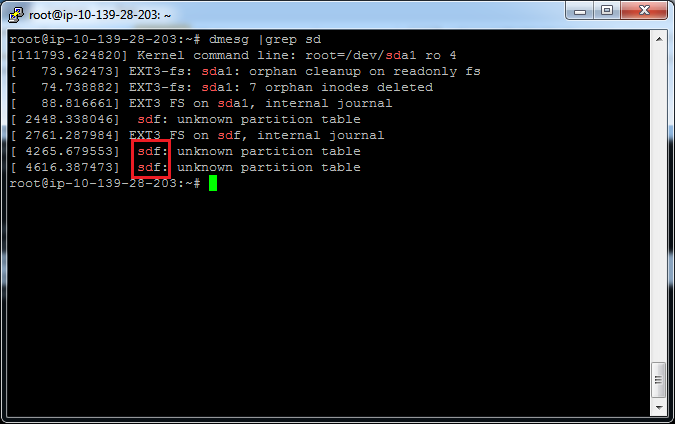
If you forgot what you put in the Device input field on step 7 (or mount compains about wrong device ID), you can do either „dmesg |grep sd“ as root or „dmesg |grep xvd“ and in the output see your latest attached device. See below:
10. If you do now something like
root@#########:/mnt/slave# cat /mnt/slave/etc/network/interfaces
# This file describes the network interfaces available on your system
# and how to activate them. For more information, see interfaces(5).
# The loopback network interface
auto lo
iface lo inet loopback
# The primary network interface
auto eth0
iface eth0 inet dhcp
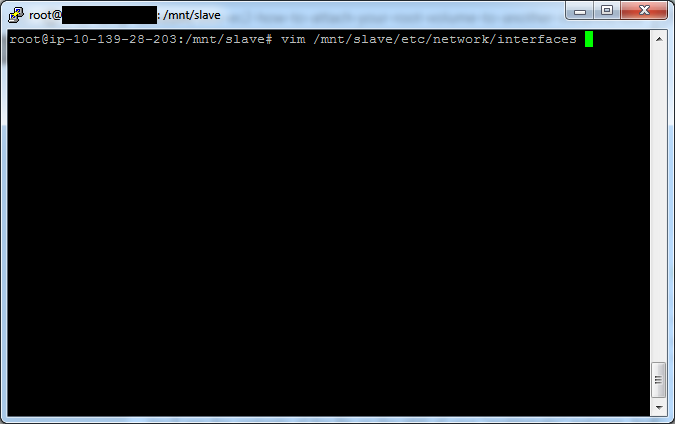
You’ll see the contents of the file on the HDD of your „problematic“ instance. Now you should correct everything with your editor like vim or nano , don’t forget to save the file.
Here is a screenshot showing how to edit the contents of a file located on the „problematic“ instance HDD:
11.
root@#########:/mnt/slave# umount /mnt/slave/
Note that in order to successfully unmount the device you should cd out of it, basically you can do cd ~ prior to unmounting it.
12. In AWS console: „Elastic Block Storage“ -> „Volumes“ -> „Detach“ on the volume you just attached. See steps 5 and 6 – you should detach the same one now.
13. Right click on the same volume (steps 5,6,12) and click „Attach“ now and select the „problematic“ instance from the drop down. It should be in (stopped) status now. Click Attach button.
14. In the „Device“ input , put down „/dev/sda1“ and click Attach button.
15. Now you may start your problematic instance. If you fix your problem by editing config on step 10, it should be bootable and connectable again. Otherwise, do the same steps again and again until you fix it.
PS. Here we used Ubuntu as our sample Linux distribution, but the commands will remain the same for all other distributions as they (sudo, mount, basic editors etc) are the same for all distributions. And don’t forget to terminate the temporary micro instance you created. Otherwise, you will be billed for it!